


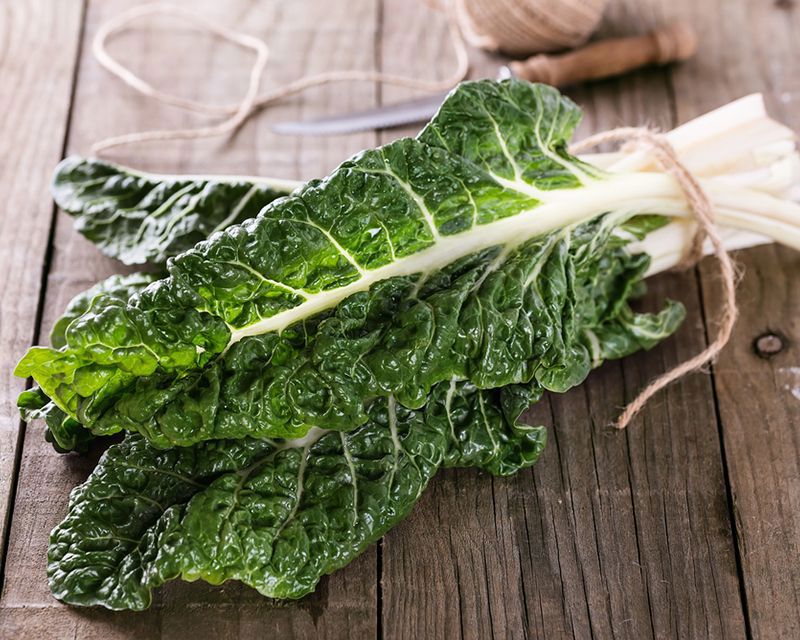
Silverbeet 'Compact Deep Green'
An easy to grow compact variety with short, white stems and large, crinkled leaves.
Create a Yates account today!
Sign up to join the Yates Garden Club for monthly e-mails packed with seasonal inspiration, tips for success & exclusive promotions.
Plus if you’re a Garden Club member you can take part in the Yates Growing Community - a blog to share successes, get advice & win prizes in fun challenges along the way!
Enter the email address associated with your account, and we'll email you a new password.
We all know we should be eating more greens: on paper, silverbeet's the obvious home-grown candidate. It has no calories, fat and cholesterol to speak of, but it's high in dietary fibre and delivers vitamins A, C, E, K and B6, as well as thiamin, folate, calcium, iron and magnesium. Silverbeet is absolutely packed with goodness.
So yes, we know humble silverbeet is full of healthy virtue - but it would fair to say it doesn't have a reputation for sensational flavour. Many of us were traumatised as children, with a soggy splat of boiled silverbeet on a plate; but good news: it has a lot more taste potential than that.
We're here to tell you; don't overlook all the delicious ways you can use silverbeet in food. There's a trick we can share, that elevates daggy old silverbeet into something mouthwatering: all you need to do is blanch it in boiling water before you add it to a dish.
After it's had a nice hot soak and a quick splash in cold water, sauté it with garlic and onions, add some crumbled feta, raisins or chopped dates, then watch how fast it disappears! How about teaming silverbeet with zesty lemon juice in a tart or a galette? If you're in a hurry, how about folding it into an omelette, or adding wilted leaves into pasta? Once you've pan-fried silverbeet with ginger, turmeric, coriander seeds and cumin seeds, you'll never look back. Search out an aloo palak recipe, you won't regret it.
Silverbeet even works as a substitute for spinach - you could do flaky spanakopita pastry parcels, or creamy lasagne. You can also add tender young silverbeet leaves to salads. We mustn't forget smoothies, it's a cinch to whizz up silverbeet in a blender.
Yates Silverbeet 'Compact Deep Green' is a smaller, bolt-resistant variety of silverbeet that’s perfect for sowing in May. It produces large, crinkled dark green leaves on short white succulent stems. It's very tasty and will be ready to harvest in just 11-12 weeks.
If you think a more lively 'party silverbeet' would hit the spot, have a look at Yates Silverbeet 'Bright Lights'. It produces vibrant coloured stems in gold, pink, orange, purple, red and white. Leaves are lightly crinkled, and green and bronze in colour. This is a great option to convince kids to eat their greens!
Or for something different you could try Yates Silverbeet 'Perpetual Green', which has smooth leaves and slim, green stalks, resembling spinach. It provides a prolific harvest and resists bolting to seed.
If you're keen to grow your own, here are the simple steps to get you started!
Seeds can be sown direct where they are to grow, or raised in trays of Yates Black Magic Seed Raising Mix and transplanted when the seedlings are 6-8 cm high.
Silverbeet prefers a sunny spot that receives at least 6 hours of sunshine a day. It can grow in either a vegie patch, or a pot filled with a good quality potting mix like Yates Premium Potting Mix.
Sow seeds 12mm deep and 30cm apart.
Keep the soil or potting mix moist and seedlings will pop up in 10-14 days.
Feed the seedlings each week with a complete liquid fertiliser like Yates Thrive Vegie Herb Liquid Plant Food, which will help promote lots of delicious leaves.
Harvest tip: begin picking young leaves as required, starting with the outside leaves. Harvest by pulling the stalks, rather than cutting them.
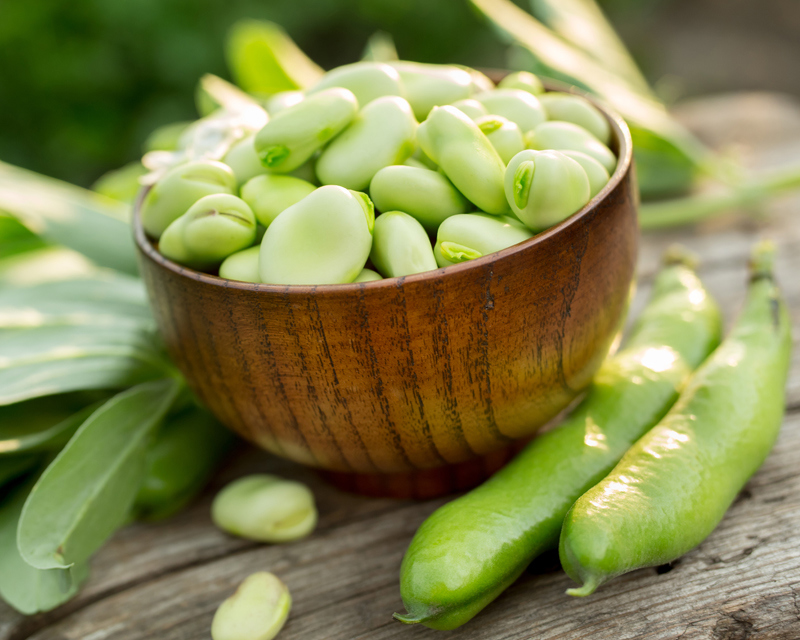
Broad beans (Vicia faba) are a nutritious source of fibre and protein, along with being full of vitamins, minerals and antioxidants. So, they're good for you, tick. But...poor old broad beans suffer from an image problem, a bit like silverbeet. When the vegetable teams are getting chosen from the lineup, broad beans and Brussels sprouts are going to be the last ones called, every time.
They're a clever choice to sow during May, because they'll be yielding heavy crops of beans in around 4 – 5 months. That's right about the time you'll have had enough of winter, and be yearning for a comforting taste of spring. And what a taste they are!
Broad beans are great contributors to soil health in your garden, too. Being legumes, they fix nitrogen in soil; then when the plants are spent you can fork them back into soil as a bonus green manure.
Yates Broad Bean ‘Evergreen’ is a tender, succulent green-seeded variety that produces small, mild flavoured beans, ideal for using fresh, or freezing.
Yates Broad Bean 'Hughey' is a tasty and prolific bean, selected by Denis Hughes in Tapanui, Otago. 'Hughey' produces attractive scarlet flowers that add some welcome winter colour to the garden. The succulent, nutty flavoured beans keep their bright green colour when cooked.
Growing Guide:
In a sunny spot in a well-drained garden bed, sow seeds 4 cm deep into moist soil that’s been enriched with some Yates Thrive Natural Blood Bone with Seaweed.
Don’t water again until the seedlings emerge in around 2 weeks. Limiting watering helps to reduce the chance of seeds rotting before they germinate.
'Evergreen' or 'Hughey' will need to be planted beside a support, as the plants can grow up to 1m tall and they become quite heavy when covered in their large pods. Supports can be constructed from tomato stakes or bamboo poles and strong garden twine.
To encourage a great harvest, as soon as the broad bean seedlings are established, start feeding each week with Yates Thrive Flower Fruit Soluble Plant Food, which is boosted with extra potassium to promote flowering and pod development.
If temperatures are low in early spring, broad beans can drop their flower buds. However, new flowers will quickly follow. Young and tender pods can be harvested, sliced and cooked as a green vegie or allow them to develop until you can feel the beans swollen inside the pod. To ‘extract’ the beans, boil the full pods for a few minutes, allow to cool and then slice the pod lengthways and pop out the beans.
Here are some broad bean recipes to inspire you to grow this delicious vegie:

Homegrown garlic is easy and rewarding to grow; autumn is the best time for planting. If you start now rather than wait for the 'shortest day', the more you'll reduce the risk of rust striking before harvest.
Step 1: Find a sunny spot in a garden bed that you can dedicate to growing garlic for 8 months or so. It does take a while for garlic to grow and mature. Ideally the soil should be well drained and on the slightly acidic side (pH of around 6). If you have alkaline soil (pH above 7), then applying some Yates Soil Acidifier Liquid Sulfur can help reduce the soil pH. Raised garden beds are ideal for growing garlic, but you can also grow it in a pot – the bigger the pot, the easier it will be to maintain (and the more garlic you can grow), so choose a pot that’s at least 30cm in diameter.
Step 2: Mix some Yates Thrive Natural Blood Bone with Seaweed into the garden soil or potting mix. This helps increase the amount of organic matter in the soil which attracts earthworms and soil microbes, helps retain moisture and nutrients in the soil and promotes better soil structure. Yates Thrive Natural Blood Bone with Seaweed will also provide the garlic with slow release organic nutrients as it establishes.
Step 3: It’s best to buy fresh garlic cloves from a garden centre, as garlic from a supermarket may have been sprayed with a sprouting inhibitor and might not grow. Choose the biggest outer cloves to plant out.
Step 4: Plant the garlic cloves around 4cm deep with the pointy end facing up, leaving around 10cm between each clove.
Step 5: After planting, water the garden bed or pot well and apply a 5cm layer of mulch like sugar cane or pea straw. This will help keep the soil moist.
Step 6: When the first garlic shoots emerge through the mulch, start feeding every fortnight with Yates Thrive All Purpose Soluble Plant Food. It’s a complete plant food that’s high in nitrogen to promote healthy leaf growth, along with phosphorus and potassium to encourage development of good-sized garlic bulbs. Keep feeding and watering regularly.
After around 8 months, or when a few of the leaves start to die back, it’s time to harvest. Hang harvested plants (with the leaves still attached) in an airy sheltered spot for about a month to dry and cure, then it’s ready to use.
Ask any chef how indispensable onions are. They may not be the star ingredient on the plate, but nothing tastes quite as good without them. It’s hard to think of a more versatile vegetable.
Our reliance on onions has been a long time in the making; they’ve been cultivated for more than 7,000 years and were distributed throughout the world by ancient travellers.
Onions are delicious any way: raw, roasted, fried, sautéed or pickled. They’re an essential ingredient in a soffritto, making them a basic building block for an enormous range of Mediterranean dishes.
Part of the allure for a home gardener is that they’re very straightforward to grow. Late autumn is a great time to sow onions because they take time to mature (5-6 months, so they're one of those vegies that needs a bit of patience). Onions can be sown until the end of winter but shouldn’t be sown too late; ideally so that you can harvest before the hottest January and February weather begins to encourage downy mildew.
If sowing in autumn, it’s best to sow into trays of Yates Black Magic Seed Raising Mix, then transplant the seedlings when they’re about 10cm tall, to cut down on weeding. It’s standard practise for onions to be sown direct where they are to grow, but you’ll need to stay on top of the weeds to get best results.
Growing Tips
You don’t have to wait for all the onion bulbs to be full sized before you harvest them. You can pick and use a few smaller bulbs and leave the rest to grow bigger.
Onions can go to seed if they aren’t planted at the right time of the year, so make sure you check the label before planting, to avoid disappointment!
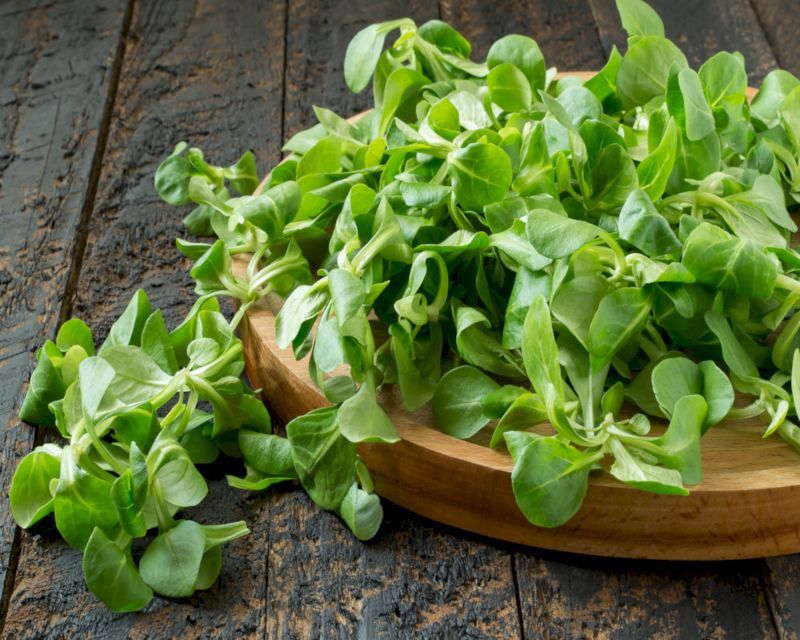
Autumn is the perfect time to sow Lamb's Lettuce, AKA Mâche or Corn Salad (Valerianella locusta). It's a small, low-growing annual that prefers a cool climate, so it's a clever choice to provide leafy salad greens through the winter. The sweet & delicate flavour makes Lamb's Lettuce work with almost any salad, or served on it's own with a tangy vinaigrette.
Growing Guide:

With delicious and enticing vegies like broccoli, Brussels sprouts, cabbage and cauliflower in full swing, caterpillars (especially cabbage white butterfly caterpillars) will be on the rampage. Even the smallest of caterpillars can chew through mountains of foliage and left unchecked can result in heartbreaking skeletonised leaves. You may not see the caterpillars themselves, just their damage or droppings, as many caterpillars are cleverly camouflaged.
Caterpillars are easy to control by regularly spraying vegies with Yates Success Ultra Insect Control.
Yates Success Ultra controls a range of common caterpillars, including cabbage white butterfly caterpillars, on a variety of plants, including potatoes, tomatoes, pip fruit and stone fruit. Spraying should start as soon as the first caterpillars or their damage is spotted and repeat applications every 7 days.
The active constituent in Yates Success Ultra, spinetoram, is derived from beneficial soil bacteria. It controls caterpillars via both contact action and ingestion. It also has what's called ‘translaminar action’, which enables it to penetrate upper leaf surfaces to move to the lower leaf surfaces, assisting coverage and helping to make it rainfast.


Share
Share this article on social media