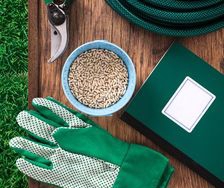


Broccoli 'Summer Green'
An excellent hot weather variety that can be planted for summer picking.
Create a Yates account today!
Sign up to join the Yates Garden Club for monthly e-mails packed with seasonal inspiration, tips for success & exclusive promotions.
Plus if you’re a Garden Club member you can take part in the Yates Growing Community - a blog to share successes, get advice & win prizes in fun challenges along the way!
Enter the email address associated with your account, and we'll email you a new password.

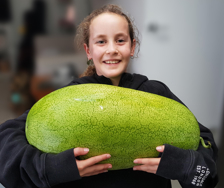
Cool, crisp juicy slices of watermelon on a sweltering hot day are one of summer’s delights. You can grow your own watermelon at home if you have a few spare square metres in a sunny garden bed.
No more space? Try growing watermelon up a sturdy trellis or over an archway! The watermelon vines can be trained up the supports, using soft ties. Yates Watermelon Sugar Baby is ideal for a trellis as it produces smaller fruit, that aren’t as heavy. As fruit matures it might need to be supported in slings; they're easy to make out of pantyhose or netting.
Growing Tips:
Before planting watermelon seeds, enrich the soil with some Yates Thrive Natural Blood Bone with Seaweed. Seeds can be sown direct into the bed. Sow 3- 4 seeds in mounds of moist soil, 1m apart and later thin to the 2 strongest plants. Feed the plants regularly with fast acting Yates Thrive Flower Fruit Soluble Fertiliser, which contains nitrogen to promote strong vine growth, and extra potassium to encourage the vines to flower and set their fruit.
Delicious melons will be ready to harvest in 12 – 14 weeks. They’re ready when the underside turns yellow and the fruit gives a dull, hollow sound when tapped.

You don’t need to have a large garden to be able to grow your own delicious green beans. Dwarf varieties of beans are ideal for small spaces and can even be grown in a pot. They’re abundant croppers too, so you can harvest lots of beans from a limited area.
We have a couple of great new dwarf varieties to try; Yates Dwarf Bean Sunshine is a stringless variety that produces long, dark green pods growing up to 17cm. It's known to give two harvests a year, with excellent yields.
Yates Dwarf Bean Labrador is an early maturing, dwarf stringless bean. It's deliciously tasty and tender, reliable in colour and appearance and beans grow to approximately 13-14cm long.
Excellent shelf-life and great for freezing.
How about trying green beans wrapped in prosciutto, green beans with cherry vinaigrette or pan-fried haloumi and green bean salad? Yum!
Starting your patch or pot of beans couldn’t be easier:
Find a sunny spot that receives at least 6 hours of sun a day.
In the vegie patch, enrich the soil first with some Yates Dynamic Lifter Organic Plant Food. For potted beans, choose a medium sized pot (around 30 cm in diameter) and fill with a good quality potting mix such as Yates Premium Potting Mix.
Sow seed 30 mm deep directly into damp soil or potting mix. Do not water for a few days after sowing (as overly wet soil can lead to the seeds rotting). Seedlings will pop up in 7 – 10 days.
Dwarf beans don’t require a trellis to climb on but if tendrils appear (particularly during prolonged cloudy weather) trim these to maintain a bushy habit.
Feed each week with Yates Thrive Flower Fruit Soluble Plant Food, which provides a complete diet for beans and helps promote healthy leaf growth as well as being boosted with additional potassium to encourage lots of beans.
Pick pods regularly promote a longer harvest.
Storage tip: if you have too many beans to eat fresh, they can be frozen for a later date. After trimming off the ends quickly boil the beans for around 3 minutes and then plunge them into a bowl of ice water. Drain and pack into bags for freezing.

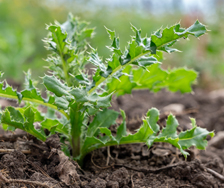
Broccoli is a powerhouse of nutrition, fibre and antioxidants, and can be used in lots of delicious dishes. Have you tried broccoli steaks? It’s time to start growing your own broccoli to keep your kitchen stocked with this super-healthy vegie.
Temperate and cool climate gardeners can start sowing a variety of broccoli called Yates Broccoli Summer Green in November. It’s an excellent, fast growing hot weather variety (which can also be grown in the cooler months) that produces a good-sized main head followed by side shoots.
Here’s how to grow a fantastic crop of Yates® Summer Green Broccoli:
Sow seeds into trays of Yates Black Magic Seed Raising Mix and keep moist. Seedlings will emerge in 6 – 10 days and can be transplanted out into s sunny vegie patch when they’re around 7 cm tall.
Before planting broccoli seedlings in the vegie patch, improve the soil first with some Yates Thrive Natural Blood Bone with Seaweed, which is certified for use in organic gardening by BioGro. It’s boosted with NZ seaweed and acts as a natural soil conditioner, as well as providing a natural boost for root development
Once the seedlings are established, regularly apply some Yates Thrive Vegie Herb Liquid Plant Food over the plants and around the root zone. It’s a complete plant food for vegies like broccoli and will encourage lots of healthy leaf growth.
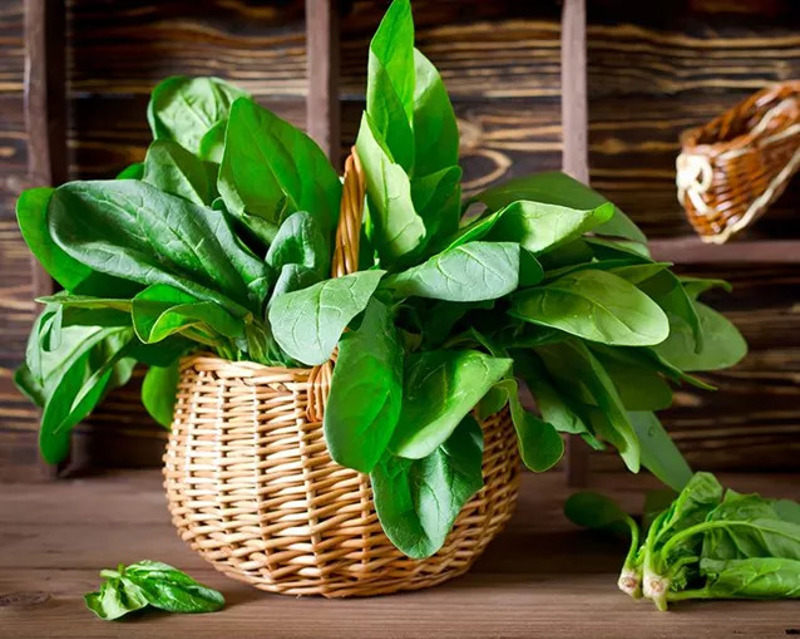
Spinach is laden with fantastic antioxidants, is high in health benefiting carotenoids and is also a good source of vitamins, fibre and protein. Often thought of as a Winter vegie, with Yates Spinach Summer Supreme there’s no need to wait until the cooler weather arrives to sow and harvest your own spinach.
Yates Spinach ‘Summer Supreme’ is a quick and easy to grow, improved variety of spinach that does well in summer. It produces large, highly nutritious leaves that have a sweet, tender flavour.
It’s as simple as sowing seed 12mm deep, direct where the plants are to grow, in a sunny or partly shaded spot in the vegie garden. Give each plant around 40cm of space to grow. Summer Supreme can also be grown in pots filled with a good quality potting mix like Yates Premium Potting Mix, so balcony, patio and veranda gardeners can still enjoy this delicious and healthy vegie.
Seeds can take 2 – 3 weeks to germinate (so don’t give up on them too quickly!) and you can be harvesting leaves in as little as 8 – 10 weeks. The beauty of loose leafy vegies like spinach is that you can harvest individual leaves as you need them.
To keep Summer Supreme spinach productive and flourishing, pick the leaves regularly and feed each week with Yates Thrive Fish Blood Bone with Seaweed. It’s a natural source of organic nutrients boosted with fast acting fertilisers, to promote healthy soil and lush spinach growth.
Pest watch: spinach can be attacked by caterpillars and aphids. Protect plants with Yates Nature’s Way Organic Citrus, Vegie Ornamental Spray Ready to Use. It contains pyrethrin, which is a natural extract from the pyrethrum daisy and vegetable oil and is approved for use in organic gardening by BioGro. Spray spinach plants each week, including the undersides of foliage where pests often hide, while caterpillars and aphids, or their damage, are noticed.

If you’re looking for yummy new vegetables to try, then the Yates Snake Bean is the variety for you!
Snake beans, also known as Yard Long Beans, are a super-productive climbing bean with thin, long crisp tender pods that can grow up to 40 cm long. They’re sweet tasting and delicious when stir fried with spices or added to curries. They are also really good fresh in a salad. Snake beans are very popular in Chinese, Indian, Malaysian and Filipino cuisines.
Snake beans enjoy warm weather and humidity, and are not frost tolerant, so in cooler areas it’s important to grow them during the warmest months of the year.
Here’s your easy Snake Bean sowing and growing guide:
Sow Yates Snake Bean seeds 30 mm deep, direct where they are to grow, next to a 2m tall support or trellis. Snake Beans need a sunny spot with well-drained soil that receives at least 6 hours of sunshine a day, and best results are achieved when the soil temperature is consistently above 20°C
To promote improved soil and healthy plant growth, enrich the soil before sowing with some Yates Thrive Natural Blood & Bone
Keep the soil only just moist. Avoid overwatering as seeds can rot before germinating
Seedlings should pop up in around 10 days
To encourage a great harvest, once the seedlings are established start feeding each week with Yates Thrive Flower & Fruit Soluble Fertiliser, which is boosted with extra potassium which promotes flowering and bean pod development
Water plants regularly to keep the soil moist
Bean pods can start to be picked 7 – 9 weeks after sowing and are at their best when young and slender, at around 30cm long
Pods grow fast, and should be picked at least every few days to keep the vines forming new pods

Turmeric (Curcuma longa) is a member of the ginger family and is best known for the bright orange fleshed aromatic rhizomes that are used as a key spice in Indian curries. Turmeric has a long history of use in traditional medicine to support digestive, liver, intestinal and joint health.
Whether you’re interested in the health aspects of turmeric or just love a good curry, you can try growing some turmeric at home. Turmeric is a herbaceous perennial ‘herb’ that resembles ginger above ground, with long elongated leaves and beautiful white and pale pink flower spikes. The edible rhizomes develop under the soil.
Turmeric needs lots of warmth and moisture, so you’ll need to live in warm temperate to sub-tropical areas of New Zealand (or have your own toasty hot house) to be successful. You might find potted turmeric plants in nurseries or you can try growing your own from organic rhizomes purchased at a supermarket.
During spring, in a warm sheltered partly shaded location with moist, free draining soil that’s been enriched with some Yates Dynamic Lifter Organic Plant Food, plant the turmeric rhizomes around 40 cm apart and 5 cm deep. Water well and keep moist. Turmeric can also be grown in a pot, at least 30 cm in diameter.
For both garden and pot grown turmeric, keep the soil moist from spring right through to autumn and feed each week with Yates Thrive All Purpose Liquid Plant Food. It’s a complete plant food that will supply the turmeric the nutrients it needs to grow healthy foliage and lots of plump tasty rhizomes.
Turmeric plants will grow until late Autumn, taking around 9 months to mature. Mature plants naturally go dormant over the winter and will spring back into growth around November. When the foliage starts to yellow and die back the entire clump of roots can be carefully dug up and separated. Use some in the kitchen and re-plant a few pieces in spring to create next year’s crop. Alternatively, in warm areas just a few rhizomes can be carefully dug up and the rest of the plant left in the ground.

Habanero chillies are steam-from-the-ears spicy. Don’t say you haven’t been warned!
If you like adding some fiery punch to your cooking, then November is an ideal time to start growing Yates Chilli Habanero at your place. They produce apple or bell shaped fruit that start out light green and mature to vivid scarlet red. They are fierce, but still deliver a fruity, complex flavour.
Habaneros can be grown in a full sun vegie patch and being compact plants are also great for growing in a container.
Here’s how to care for your Habanero Chillies:
Before planting into a vegie patch, mix some Yates Dynamic Lifter Organic Plant Food into the soil. Dynamic Lifter is a rich source of organic matter that helps improve the quality of the soil and encourages earthworms and beneficial soil microorganisms. For container grown chillies, use a good quality potting mix like Yates Premium Potting Mix.
Seed can be sown direct into the vegie patch or container, or raised in trays of Yates Black Magic Seed Raising Mix and the seedlings transplanted when they’re around 5 cm high.
Once seedlings are established, start feeding each week with Yates Thrive Tomato Liquid Plant Food, which will provide the chilli plants with a balanced diet of nutrients to promote lots of healthy leaf growth and additional potassium to encourage lots of flowers which will turn into bright and tasty fruit.
Keep the soil or potting mix around chilli plants consistently moist. Potted plants will dry out more rapidly than in-ground chillies.
Spread a 3 – 5 cm layer of mulch, such as Lucerne or pea straw, around the chilli plants, which helps reduce moisture loss from the soil.
Protect chilli plants from common pests like aphids, mites and whitefly by spraying Yates Nature’s Way Natrasoap Vegie Insect Gun over the foliage every 10 – 12 days.
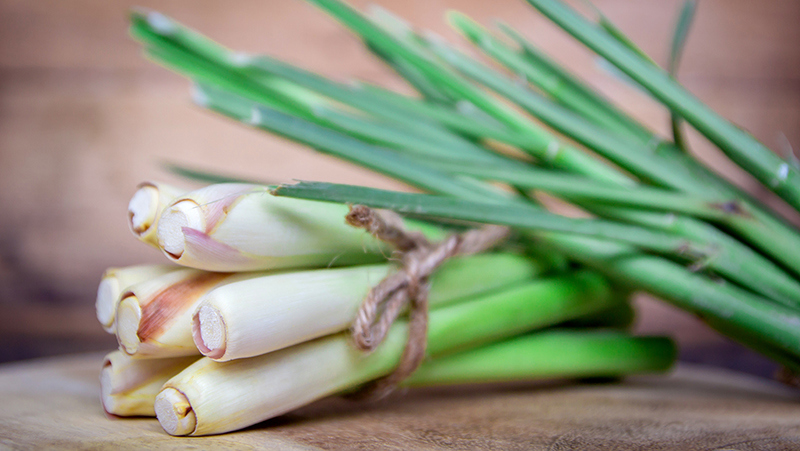
Lemongrass (Cymbopogon citratus) is a wonderful aromatic warm climate grass with a strong citrus scent and flavour. It’s versatile and can be used in both sweet and savoury dishes, including teas and tonics, curries and other tasty Asian recipes, salads, seafood, sauces and syrups.
Lemongrass sticks can also be used as skewers and meat threaded onto the sticks and barbequed or grilled, imparting a delicious hint of lemon.
Lemongrass seed can be sown in warm areas in New Zealand in November and it's happy to grow both in the ground and in pots.
Potted lemongrass is ideal for cooler climates as the pot can be moved under cover for winter, as lemongrass needs protection from frost. Lemongrass is a vigorous plant that can be grown in either full sun or part shade and has attractive upright leafy growth.
Growing Tips:
Sow seed 5 mm deep directly where the plants are to grow, keep moist and seedlings will emerge in 10 – 14 days.
Feed plants regularly with a complete plant food like Yates Thrive All Purpose Soluble Plant Food, to promote lots of healthy leafy growth.
Allow the lemongrass to establish before beginning to harvest.
Cut or snap stems off as close to the ground as possible once they reach 0.5 to 1 cm in diameter. Picking stems regularly will promote fresh new growth.
If your lemongrass starts to grow a little too large or becomes straggly, the entire clump can be cut back hard to around 30 cm tall. Do this during the warmer seasons and fresh new leaves will emerge in a matter of weeks.

Beetroot is a versatile and delicious vegie that’s low in fat and is a rich source of folate and fibre. The red pigment in beetroot is also reported to have anti-inflammatory and antioxidant health benefits, so there are lots of fantastic reasons to eat beetroot.
The root part of beetroot can be roasted, used in relish, hummus, soups and sandwiches and the colourful leaves can be mixed into salads.
Larger beetroot varieties like Yates Beetroot Super King and Yates Beetroot Derwent Globe are great for growing in a sunny vegie patch.
Here’s how to grow your very own beetroot:
Prepare and enrich the soil in the vegie patch by digging in some Yates Thrive Natural Blood Bone with Seaweed. This will add valuable organic matter to the soil and provide the establishing plants with gentle, slow release organic nutrients.
Each ‘seed’ is a cluster of 1-4 true seeds in a corky outer coating. Soak the seed for two hours before sowing to ensure water penetrates to the seeds.
Sow the seeds directly into the vegie patch, 12 mm deep.
Seedlings will emerge in 10 – 14 days.
Beetroot roots can be harvested after 10 – 12 weeks. A few young tender leaves per plant can be picked earlier for use in salads.
Apply further Yates Thrive Natural Blood Bone with Seaweed around the root zone to encourage healthy leaf growth and root development.
Space saver tip:
Balcony and patio gardeners can still enjoy their very own beetroot by growing Yates Beetroot Baby Beets in pots or troughs. They’re tender and sweet, and ready to harvest only 6-7 weeks after sowing.
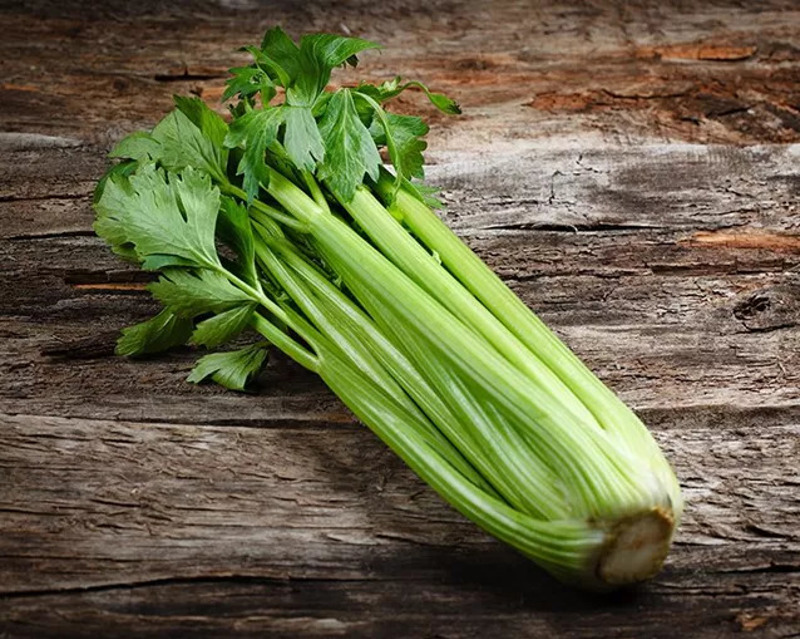
How often have you purchased a bunch of celery from the supermarket, only to use just a few stalks and the rest goes yellow and limp in the bottom of the crisper? It doesn’t need to be this way! If you grow your own celery, you can harvest individual crisp and crunchy stalks as you need them.
Yates Celery Green Crunch is a delicious celery with long stringless bright green stalks. Whether you use your celery in salads, soups, smoothies or stir fries or as a low carb cracker alternative with a tasty dip, it’s a healthy and versatile vegie to have on hand.
Growing Tips:
During November in cool and temperate areas, sow Yates Celery Green Crunch seed 6 mm deep in trays of Yates Black Magic Seed Raising Mix or sow direct into a sunny vegie patch or a medium sized pot.
Seedlings will start to pop up in 2 – 3 weeks and be fully mature from 20 weeks. Single stalks can be harvested earlier than this as required. Pick the outer stems first with a sideways pull, leaving the young leaves to continue to grow.
For paler, sweeter celery stems, exclude light by wrapping the lower stems for the last few weeks before harvest. This is a technique called blanching and the stems can be wrapped in newspaper and gently fixed with twine or a large waxed juice carton can be placed over the stems, leaving the top leaves exposed. Another method is to use a section of PVC pipe, which can be reused each year.
To help keep celery plants healthy and productive, feed them each week with Yates Thrive Vegie Herb Liquid Plant Food. It’s a complete and balanced fertiliser that contains the right nutrients to encourage lots of tasty stems of celery. Dilute 1 to 2 capfuls of Yates Thrive in a 9 L watering can and apply over the soil and root zone.


Share
Share this article on social media